

Welcome to another post from my blog. In this post, we’ll talk about a web framework that has become popular in the construction of single-page web applications: Angularjs. But after all, what is a single-page application?
Single-page applications
Single-page applications, as the name implies, consist of applications where only a single “page” – or as we also call, HTML document – is submitted to the client, and after this initial load, only fragments of the page are reloaded, by Ajax requests, without ever making a full page reload. The main advantage we have in this web application model is that, due to minimizing the data traffic between the client and the server, it provides the user with a highly dynamic application, with low “latency” between user actions on the interface. A point of attention, however, is that in this application model, much of the “weight” of the application processing falls to the client side, then the device’s capabilities where the user is accessing the application can be a problem for the adoption of the model, especially if we are talking about applications accessed on mobile devices.
Developed by Google, Angularjs brought features that allow you to build in a well structured way applications in single-page model, through the use of javascript as an extension built on top of HTML pages. One of the advantages of the framework is that it integrates seamlessly into HTML, allowing the developer team to, for example, reuse the pages of a prototype made by a web designer.
Architecture
The framework architecture works with the concept of been a html extension of the page to which it is linked. As a javascript library, imported within the pages, which through the use of policies – kind of attributes that are embedded within their own html tags, usually with the prefix “NG” – performs the compilation of all the code belonging to the framework generating dynamic code – html, css and javascript – that the user use through his browser. For readers who are interested in knowing more deeply the architecture behind the framework, the presentation below speaks in detail about this topic:
Although the framework has high flexibility in the construction of layouts due to the use of pure html, it lacks ready layout options, so to make the application with a more pleasant graphical interface, it enters the bootstrap, providing CSS styles – plus pre-build behavior in javacript and dynamic html – that enable an even richer layout for the application. At the end of this post, beyond the official angularjs site, you can also access the link to the official site of the bootstrap.
The MVC model
In the web world, is well known the pattern MVC (Model – View – Controller). In this pattern, we define that the web application is defined in 3 layers with different responsibilities:
View: In this layer, we have the code related to the presentation to the end user, with pages and rules related to navigation, such as control of the flags of a register in the “wizard” format, for example.
Controller: This layer is the code that bridges between the navigation and the source of application data, represented by the model layer. Processing and business rules typically belong to this layer.
Model: In this layer is the code responsible for performing the persistence of the application data. In a traditional web application, we commonly have a DBMS as a data source.
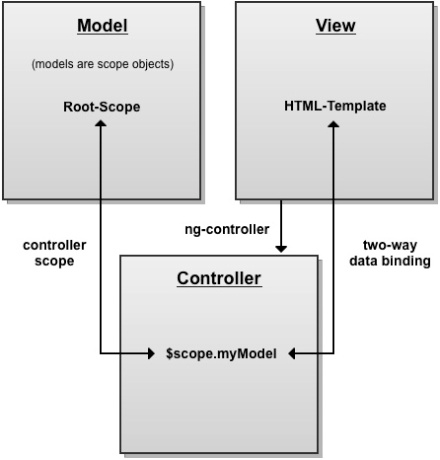
Speaking in the context of angularjs, as we see below, we have the view layer represented by the html pages. These pages communicate with the controller layer through policies explained in the beginning of our post, invoking the controllers of the framework, consisting of a series of javascript functions encoded by the developer. These functions use a binding layer, provided by the framework, called $ scope, which is populated by the controller and displayed by the view, representing the model layer. Typically, in the architecture of a angularjs system, we have the model layer being filled through REST services.
The figure below illustrates the interaction between these layers:
Hands-on
For this hands-on, we will use the Wildfly 8.1.0 server, angularjs and the bootstrap. At the time of this post, the latest version (stable) of angularjs is 1.2.26 and for the bootstrap is 3.2.0. As IDE, I am using Eclipse Luna.
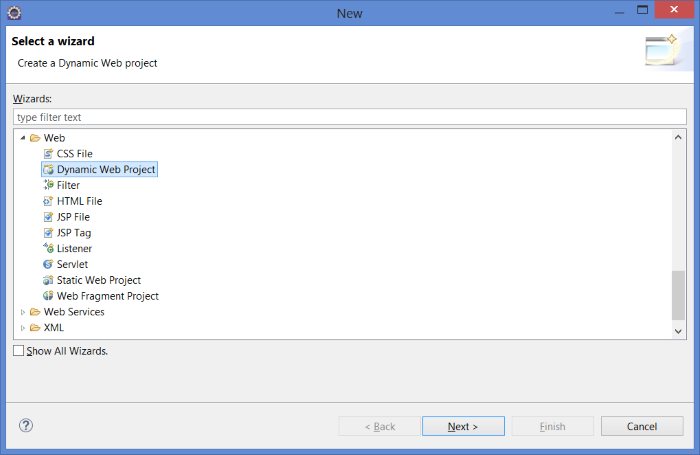
First, the reader must create a project of type “Dynamic Web Project” by selecting the wizard image below. In fact, it would be perfectly possible to use static web project as a project, but we’ll use the dynamic only to facilitate the deploy on the server.
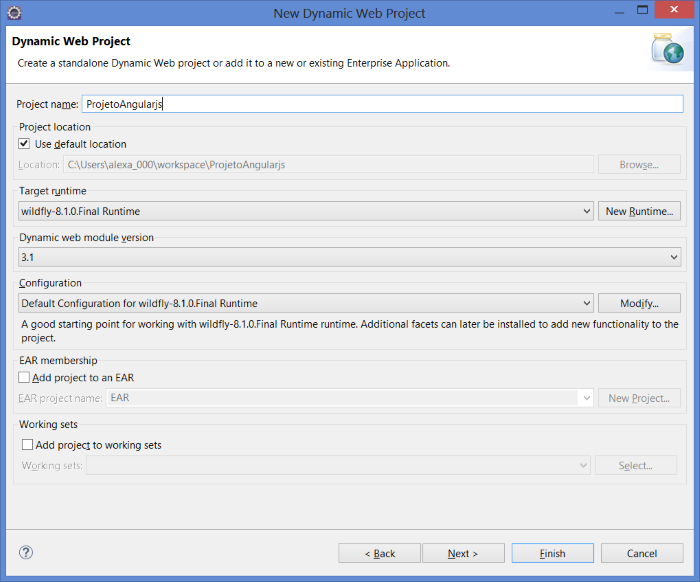
Following the wizard, remember to select the runtime Wildfly, as indicated below, and select the checkbox that calls for the creation of the descriptor “web.xml” on the last page of the wizard.
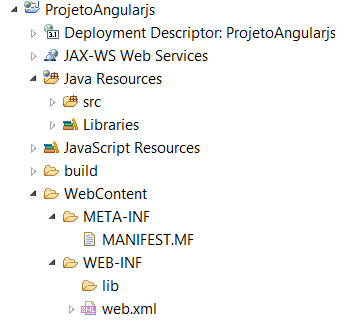
At the end, we will have a project structure like the one below:
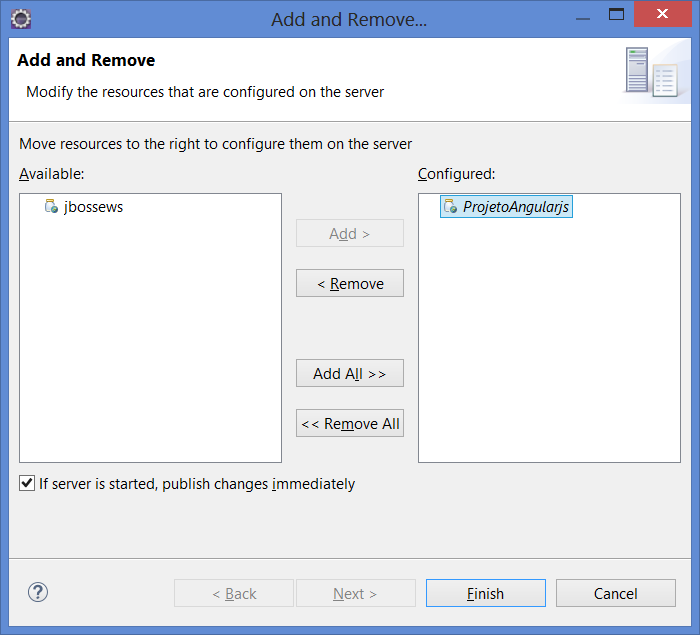
As a last step of project configuration, we will add the project in the automatically deployed application list on our Wildfly server. To do this, select the server from the perspective of servers, select the “add or remove” and move the application to the list of configured applications, as follows:
Including the angularjs and bootstrap on the application
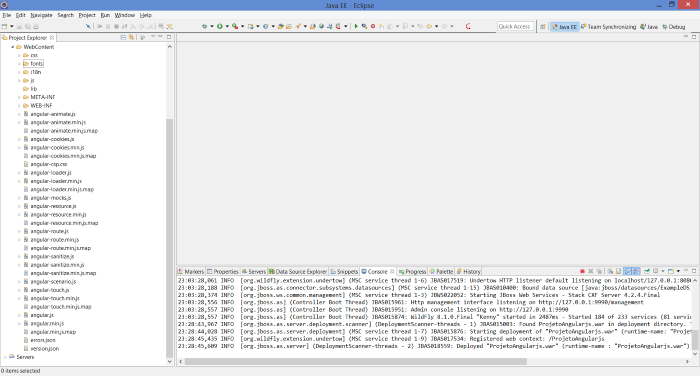
To include the angular and the bootstrap in our application, simply include the contents thereof, consisting of js files, css, etc inside the folder “webcontent” generating the project structure below:
PS: This structure aims only to provide a quick and easy way to set the environment for the realization of our learning. In a real application, the developer has the freedom to not include all angular files, including only those whose resources will be used in the project.
Starting our development, we will create a simple page containing a single page application that consists of a list of tasks, with the option of new tasks and filtering tasks already completed. Keep in mind that the goal of this small application is only to show the basic structure of angularjs. In a real application, the js code should be structured in directories, ensuring readability and maintainability of the code.
Thus, we come to the implementation. To deploy it, we will create an html page called “index.html”, and put the code below:
<!DOCTYPE html>
<html ng-app=”todoApp”>
<head>
<title>Tarefas</title>
<link href=”css/bootstrap.css” rel=”stylesheet” />
<link href=”css/bootstrap-theme.css” rel=”stylesheet” />
<script src=”angular.js”></script><script>
var model = {
user: “Alexandre”,
items: [{ action: “Ir á padaria”, done: false },
{ action: “Comprar remédios”, done: false },
{ action: “Pagar contas”, done: true },
{ action: “Ligar para Ana”, done: false }]
};var todoApp = angular.module(“todoApp”, []);
todoApp.filter(“checkedItems”, function () {
return function (items, showComplete) {
var resultArr = [];
angular.forEach(items, function (item) {if (item.done == false || showComplete == true) {
resultArr.push(item);
}
});
return resultArr;
}
});todoApp.controller(“ToDoCtrl”, function ($scope) {
$scope.todo = model;$scope.addNewItem = function(actionText) {
$scope.todo.items.push({ action: actionText, done: false});
}});
</script></head>
<body ng-controller=”ToDoCtrl”>
<div class=”page-header”>
<h1>
Tarefas de {{todo.user}}
</h1>
</div>
<div class=”panel”>
<div class=”input-group”>
<input class=”form-control” ng-model=”actionText” />
<span class=”input-group-btn”>
<button class=”btn btn-default”
ng-click=”addNewItem(actionText)”>Add</button>
</span>
</div><table class=”table table-striped”>
<thead>
<tr>
<th>Description</th>
<th>Done</th>
</tr>
</thead>
<tbody>
<tr ng-repeat=
“item in todo.items | checkedItems:showComplete | orderBy:’action'”>
<td>{{item.action}}</td>
<td><input type=”checkbox” ng-model=”item.done” /></td>
</tr>
</tbody>
</table><div class=”checkbox-inline”>
<label><input type=”checkbox” ng_model=”showComplete”> Show Complete</label>
</div>
</div></body>
</html>
As we can see, we have a simple html page. First, insert the policy “ng-app”, which initializes the framework on the page, and import the files needed for the operation of the angular and the bootstrap:
<html ng-app=”todoApp”>
<head>
<title>Tarefas</title>
<link href=”css/bootstrap.css” rel=”stylesheet” />
<link href=”css/bootstrap-theme.css” rel=”stylesheet” />
<script src=”angular.js”></script>
Following is the creation of a module. A angularjs module consists of other components such as filters and controllers, constituting a unit similar to a package that can be imported into other application modules. For the initial data source, we put a JSON structure in a JavaScript variable, which is inserted into the binding layer later. In addition, we also have to create a filter. Filters, as the name implies, are created to provide a means of filtering the data of a listing. Later on we will see that use in practice:
<script>
var model = {
user: “Alexandre”,
items: [{ action: “Ir á padaria”, done: false },
{ action: “Comprar remédios”, done: false },
{ action: “Pagar contas”, done: true },
{ action: “Ligar para Ana”, done: false }]
};var todoApp = angular.module(“todoApp”, []);
todoApp.filter(“checkedItems”, function () {
return function (items, showComplete) {
var resultArr = [];
angular.forEach(items, function (item) {if (item.done == false || showComplete == true) {
resultArr.push(item);
}
});
return resultArr;
}
});
Moving on we have the construction of the controller, which as already explained, is responsible for performing the interaction with the binding layer, beyond the call to external resources to the page, such as REST services. In our example, we link the JSON structure created earlier with our binding layer and create a function for adding new tasks to a action:
todoApp.controller(“ToDoCtrl”, function ($scope) {
$scope.todo = model;$scope.addNewItem = function(actionText) {
$scope.todo.items.push({ action: actionText, done: false});
}});
</script>
Once we have our populated binding, it is easy for us to display its values, as in the example below, where we show the value of “user”. We also define a form to our inclusion of tasks:
<body ng-controller=”ToDoCtrl”>
<div class=”page-header”>
<h1>
Tarefas de {{todo.user}}
</h1>
</div>
<div class=”panel”>
<div class=”input-group”>
<input class=”form-control” ng-model=”actionText” />
<span class=”input-group-btn”>
<button class=”btn btn-default”
ng-click=”addNewItem(actionText)”>Add</button>
</span>
</div>
Finally, we have the proper view of the tasks. To do this, we use the “ng-repeat” policy. The reader will notice that we have made use of our filter, and we ask the angularjs to order our list by the “action” value. In addition, we can also see the binding for changing the filter, through the checkboxes to enable / disable filtering, in addition to the marking of completed tasks
<table class=”table table-striped”>
<thead>
<tr>
<th>Description</th>
<th>Done</th>
</tr>
</thead>
<tbody>
<tr ng-repeat=
“item in todo.items | checkedItems:showComplete | orderBy:’action'”>
<td>{{item.action}}</td>
<td><input type=”checkbox” ng-model=”item.done” /></td>
</tr>
</tbody>
</table><div class=”checkbox-inline”>
<label><input type=”checkbox” ng_model=”showComplete”> Show Complete</label>
</div>
</div>
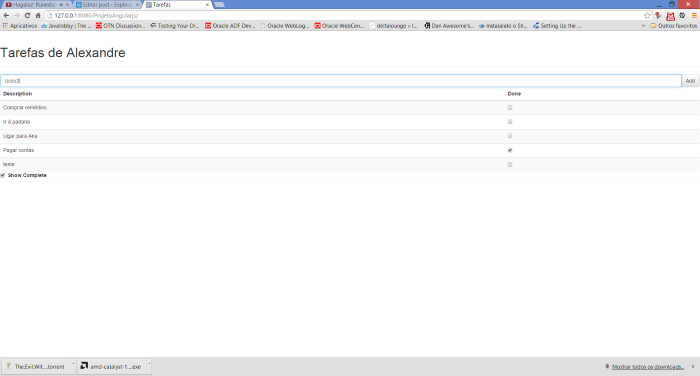
The final screen in operation can be seen below:
 Conclusion
And so we conclude our post on angularjs. With design flexibility and an easy learning structure, its adoption as well as the single page applications model is a powerful tool that every web developer should have in his pocket knife options. Thanks to everyone who supported me in this post, until next time.
