gRPC: Transporting massive data with Google’s serialization

Standard

Hello, dear readers! Welcome to my blog. On this post, we will delve on Google’s RPC style solution, gRPC and his serialization technique, protocol buffers. But what is gRPC and why it is so useful? Let’s find out!

The escalation of data transfer

When developing APIs, one of the most common ways of implementing the interface is with REST, using HTTP and JSON as transportation protocol and data schema, respectively. At first, there is no problem with this approach, and most of the time we won’t need to change from this kind of stack.

However, the problems begin when we get a API that has a big continuous volume of requests. On a situation like this, the amount of memory used on tasks like data transportation could begin to be a burden on the API, making calls more and more slow.

It is on this scenario that gRPC comes in handy. With a server-client model and a serialization technique from Google’s that allows us to shrink the amount of resources used on remote calls, we can scale more capacity per API instance, making our APIs more powerful.

This comes with a price, however: operations like debugging get more difficult on this scenario, because gRPC encapsulates the transportation logic on Google’s solution that utilizes binary serialization to do the transportation, so it is not as easily debuggable as a common plain REST/JSON application.

RPC

RPC is a acronym for Remote Procedure Call, a old model that was much used on the past. On that model, a client-server solution is developed, where the details of transport are abstracted from the developer, been responsible only for implementing the server and client inner logic. Famous RPC models were CORBA, RMI and DCOM.

Despite the name, gRPC only has the concept of a client-server application in common with the old solutions, that suffered from problems such as incompatible protocols between each other, alongside with not offering more advanced techniques from today, such as streams. Their solutions reminds more of the classical request-response model, from the first days of the web.

gRPC

So what is gRPC? This is Google’s approach to a client-server application that takes principles from the original RPC. However, gRPC allows us to use more sophisticated technologies such as HTTP2 and streams. gRPC is also designed as technology-agnostic, which means that can be used and interacted with server and clients from different programming languages.

With gRPC we develop gRPC services, which are generated based on a proto file we provide. Using the proto file, gRPC generates for us a server and a stub (some languages just call it a client) where we develop our server and client logic. The following diagram, taken from gRPC documentation, represents the client-server schematics:

grpc-1

As we can see on the diagram, gRPC supplies us with different types of languages to choose from to develop /expose our gRPC services. At the time of this post, gRPC supports Java, C++, Python, Objective-C, C#, a lite-runtime (Android Java), Ruby, JavaScript and Go – using the golang/protobuf library.

Protocol Buffers

Protocol buffer is gRPC’s serialization mechanism, which allows us to send compressed messages between our services, allowing us in turn to process more data with less network roundtrips between the parts.

According to Protocol Buffers documentation, Protocol Buffers messages offers the following advantages, if we compare to a traditional data schema such as XML:

  • are simpler
  • are 3 to 10 times smaller
  • are 20 to 100 times faster
  • are less ambiguous
  • generate data access classes that are easier to use programmatically

The Protocol Buffers framework supplies us with several code generators for different programming languages. If we want to develop on Java, for instance, we download Protocol Buffers for Java, then we model a proto file where we design the schema for the messages we will transport and then we generate code using the protoc compiler.

The compiler will generate code for us in order to use for serialize/deserialize data on the format we provided on the proto file.

Types of gRPC applications

gRPC applications can be written using 3 types of processing, as follows:

  • Unary RPCs: The simplest type and more close to classical RPC, consists of a client sending one message to a server, that makes some processing and returns one message as response;
  • Server streams: On this type, the client sends one message for the server, but receives a stream of messages from the server. The client keeps reading the messages from the server until there is no more messages to read;
  • Client streams: This type is the opposite of the server streams one, where on this case is the client who sends a stream of messages to make a request for the server and them waits for the server to produce a single response for the series of request messages provided;
  • Bidirecional stream RPC: This is the more complex but also more dynamic of all the types. On this model, we have both client and server reading and writing on streams, which are stablished between the server and client. This streams are independent from each other, which means that could be possible for a client to send a message to a server by one stream and vice-versa at the same time. This allows us to make multiple processing scenarios, such as clients sending all the messages before the responses, clients and servers “ping-poinging” messages between each other and so on.

Synch vs. Asynch

As the name implies, synchronous processing occurs when we have a communication where the client thread is blocked when a message is sent and is been processed.

Asynchronous processing occurs when we have this communication with the processing been done by other threads, making the whole process been non-blocking.

On gRPC we have both styles of processing supported, so it is up to the developer to use the better approach for his solutions.

Deadlines & timeouts

A deadline stipulates how much time a gRPC client will wait on a RPC call to return before assuming a problem has happened. On the server’s side, the gRPC services can query this time, verifying how much time it has left.

If a response couldn’t be received before the deadline is met, a DEADLINE_EXCEEDED error is thrown and the RPC call is terminated.

RPC termination

On gRPC, both clients and servers decide if a RPC call is finished or not locally and independently. This means that a server can decide to end a call before a client has transmitted all their messages and a client can decide to end a call before a server has transmitted one or all of their responses.

This point is important to remember specially when working with streams, in a sense that logic must pay attention to possible RPC terminations when treating sequences of messages.

Channels

Channels are the way a client stub can connect with gRPC services on a given host and port. Channels can be configured specific by client, such as turning message compression on and off for a specific client.

Tutorial

On this lab we will implement a gRPC service, test by making some calls and experimenting a little with streams. It will get us a feel and a head start on how to develop solutions using gRPC.

Set up

For this lab we will use Python 3.4. For the coding, I like to use Pycharm, is a really good IDE for Python that the reader can find it here.

For containerization I used Docker 17.03.1-ce. I also recommend you create a virtual environment for the lab, using virtualenv.

Let’s create a new virtual environment for our lab. On a terminal, let’s type the following:

virtualenv --python=python3.4 -v grpc-handson

After running the command, we will see that a folder was created. That is our virtual environment.

To install gRPC, first we enable the virtual environment on our terminal session. we do this by typing the following, assuming we are inside the virtual environment’s folder:

source ./bin/activate

This will change our terminal, that will now show a prefix with our env’s name, showing it is enabled.

Now on to the installation. First, let’s install gRPC with pip by typing:

python -m pip install grpcio

We also need to install gRPC tools. This tools are responsible for installing the protoc compiler which we will use later on the lab. We install it by typing:

python -m pip install grpcio-tools

That’s it! Now that we have our environment, let’s start with the development.

Creating the gRPC Service definition

First, we create a gRPC Service definition. We create this by coding a proto file, which will have the following:

syntax = "proto3";

option java_multiple_files = true;
option java_package = "com.alexandreesl.handson";
option java_outer_classname = "MyServiceProto";
option objc_class_prefix = "HLW";

package handson;


service MyService {

    rpc MyMethod1 (MyRequest) returns (MyResponse) {
    }

    rpc MyMethod2 (MyRequest) returns (MyResponse) {
    }

}

message MyRequest {
    string name = 1;
    int32 code = 2;
}

message MyResponse {
    string name = 1;
    string sex = 2;
    int32 code = 3;
}

This file is based on examples from the official gRPC repo – you can find the link at the end of this post. Alongside setting some properties such as the service’s package, we defined a service with 2 methods and 2 schemas for the protocol buffers, used by the methods.

With the proto file created (let’s save it as my_service.proto), it is time for us to use gRPC to create the code.

Generating gRPC code

To generate the code, let’s run the following command, with our virtual environment enabled and on the same folder of the proto file:

 python -m grpc_tools.protoc -I. --python_out=. --grpc_python_out=. my_service.proto

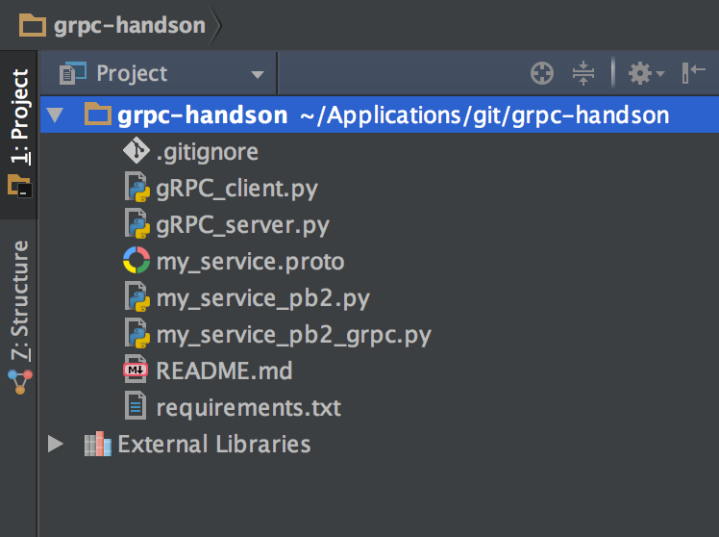
After running the command, we will see 2 files created, as we can see bellow:

grpc-2

PS: The source code for our lab can be found at the end of the post.

Building the server

Now that we have our code generated, let’s begin our work. Let’s begin by creating the server side.

The code from our command is auto-generated, so is not a good practice to code on them. Instead, for the server we will extend the servicer class, so we implement our own gRPC service without editing generated code.

Let’s create a file called gRPC_server.py and add the following code:

import time
from concurrent import futures

import grpc

import my_service_pb2 as my_service_pb2
import my_service_pb2_grpc as my_service_pb2_grpc

_ONE_DAY_IN_SECONDS = 60 * 60 * 24


class gRPCServer(my_service_pb2_grpc.MyServiceServicer):
    def __init__(self):
        print('initialization')

    def MyMethod1(self, request, context):
        print(request.name)
        print(request.code)
        return my_service_pb2.MyResponse(name=request.name, sex='M', code=123)

    def MyMethod2(self, request, context):
        print(request.name)
        print(request.code * 12)
        return my_service_pb2.MyResponse(name=request.name, sex='F', code=1234)


def serve():
    server = grpc.server(futures.ThreadPoolExecutor(max_workers=10))
    my_service_pb2_grpc.add_MyServiceServicer_to_server(
        gRPCServer(), server)
    server.add_insecure_port('[::]:50051')
    server.start()
    try:
        while True:
            time.sleep(_ONE_DAY_IN_SECONDS)
    except KeyboardInterrupt:
        server.stop(0)


if __name__ == '__main__':
    serve()

On the code above we created a class that it is a subclass of the class generated by the protoc compiler. We can see that in order to get the request’s parameters, all we have to do is navigate from the request object. To generate a response, all we have to do is instantiate the appropriate class.

We also coded the serve method, where we created a server with 10 worker threads to serve requests and initialized with the class we created to implement the server-side.

To start the server, all we have to do is run:

python gRPC_server.py

And from now on, unless we kill the process, it will be answering on the 50051 port.

Now that we created the server, let’s begin the work on the client.

Constructing the client

In order to consume the server, we need to create a client for our stub. Let’s do this.

Let’s create a file called gRPC_client.py and code the following:

import grpc

import my_service_pb2 as my_service_pb2
import my_service_pb2_grpc as my_service_pb2_grpc


class gRPCClient():
    def __init__(self):
        channel = grpc.insecure_channel('localhost:50051')
        self.stub = my_service_pb2_grpc.MyServiceStub(channel)

    def method1(self, name, code):
        print('method 1')
        return self.stub.MyMethod1(my_service_pb2.MyRequest(name=name, code=code))

    def method2(self, name, code):
        print('method 2')
        return self.stub.MyMethod2(my_service_pb2.MyRequest(name=name, code=code))


def main():
    print('main')

    client = gRPCClient()

    print(client.method1('Alexandre', 123))
    print(client.method2('Maria', 123))


if __name__ == '__main__':
    main()

As we can see, is really simple to create a client: we just needed to establish a channel and instantiate a stub with it. Once instantiated, we just need to call the methods on the stub as we normally would do with any Pythonic object.

Now that we have the coding done, let’s test some calls!

Making the call

To test a call, let’s first start the server. With a terminal session opened and our virtual environment enabled, let’s start the server, by entering the command we talked about earlier:

python gRPC_server.py

And on another terminal, started like the previous one, we call the client by typing:

python gRPC_client.py

After firing up the client, we will see that the client produced the following output:

main
method 1
name: "Alexandre"
sex: "M"
code: 123

method 2
name: "Maria"
sex: "F"
code: 1234

And on the server terminal, we can see the following output:

initialization
Alexandre
123
Maria
1476

Success! We have implemented our first gRPC service. Now, let’s wrap it up our lab by seeing the last topics: using streams and containerization.

Using streams

To learn about streams, let’s add a new method, that it will be a bidirectional streaming.

First, let’s change the proto file, creating a new method, like the following:

syntax = "proto3";

option java_multiple_files = true;
option java_package = "com.alexandreesl.handson";
option java_outer_classname = "MyServiceProto";
option objc_class_prefix = "HLW";

package handson;


service MyService {

    rpc MyMethod1 (MyRequest) returns (MyResponse) {
    }

    rpc MyMethod2 (MyRequest) returns (MyResponse) {
    }

    rpc MyMethod3 (stream MyRequest) returns (stream MyResponse) {
    }

}

message MyRequest {
    string name = 1;
    int32 code = 2;
}

message MyResponse {
    string name = 1;
    string sex = 2;
    int32 code = 3;
}

That’s right, this is everything we need to do. After generating the files from the proto again, we need to modify our server to reflect the changes. We do this modifying the file as follows:

import time
from concurrent import futures

import grpc

import my_service_pb2 as my_service_pb2
import my_service_pb2_grpc as my_service_pb2_grpc

_ONE_DAY_IN_SECONDS = 60 * 60 * 24


class gRPCServer(my_service_pb2_grpc.MyServiceServicer):
    def __init__(self):
        print('initialization')

    def MyMethod1(self, request, context):
        print(request.name)
        print(request.code)
        return my_service_pb2.MyResponse(name=request.name, sex='M', code=123)

    def MyMethod2(self, request, context):
        print(request.name)
        print(request.code * 12)
        return my_service_pb2.MyResponse(name=request.name, sex='F', code=1234)

    def MyMethod3(self, request_iterator, context):
        for req in request_iterator:
            print(req.name)
            print(req.code)

            yield my_service_pb2.MyResponse(name=req.name, sex='M', code=123)


def serve():
    server = grpc.server(futures.ThreadPoolExecutor(max_workers=10))
    my_service_pb2_grpc.add_MyServiceServicer_to_server(
        gRPCServer(), server)
    server.add_insecure_port('[::]:50051')
    server.start()
    try:
        while True:
            time.sleep(_ONE_DAY_IN_SECONDS)
    except KeyboardInterrupt:
        server.stop(0)


if __name__ == '__main__':
    serve()

As we can see, the new MyMethod3 receives a iterator of request messages and also send a series of responses as well, by using the yield keyword, which teaches Python to create a generator from our function. We can read more about the yield keyword on this link.

Now we modify the client. We also use a generator with the yield keyword, but on this case, we make the generator create each item at random time intervals, to simulate a real life application with data entering at intervals. The response stream is read with a simple for loop, that it will continue to run until there is no data to output:

import random
import time

import grpc

import my_service_pb2 as my_service_pb2
import my_service_pb2_grpc as my_service_pb2_grpc


class gRPCClient():
    def __init__(self):
        channel = grpc.insecure_channel('localhost:50051')
        self.stub = my_service_pb2_grpc.MyServiceStub(channel)

    def method1(self, name, code):
        print('method 1')
        return self.stub.MyMethod1(my_service_pb2.MyRequest(name=name, code=code))

    def method2(self, name, code):
        print('method 2')
        return self.stub.MyMethod2(my_service_pb2.MyRequest(name=name, code=code))

    def method3(self, req):
        print('method 3')
        return self.stub.MyMethod3(req)


def generateRequests():
    reqs = [my_service_pb2.MyRequest(name='Alexandre', code=123), my_service_pb2.MyRequest(name='Maria', code=123),
            my_service_pb2.MyRequest(name='Eleuterio', code=123), my_service_pb2.MyRequest(name='Lucebiane', code=123),
            my_service_pb2.MyRequest(name='Ana Carolina', code=123)]

    for req in reqs:
        yield req
        time.sleep(random.uniform(2, 4))


def main():
    print('main')

    client = gRPCClient()

    print(client.method1('Alexandre', 123))
    print(client.method2('Maria', 123))

    res = client.method3(generateRequests())

    for re in res:
        print(re)


if __name__ == '__main__':
    main()

If we restart the server and run the new client, we will receive the following output:

main
method 1
name: "Alexandre"
sex: "M"
code: 123

method 2
name: "Maria"
sex: "F"
code: 1234

method 3
name: "Alexandre"
sex: "M"
code: 123

name: "Maria"
sex: "M"
code: 123

name: "Eleuterio"
sex: "M"
code: 123

name: "Lucebiane"
sex: "M"
code: 123

name: "Ana Carolina"
sex: "M"
code: 123


Process finished with exit code 0

Please note that all this calls were made using the synchronous approach, so the client thread is locked each time a call is made. If we wanted to call the server asynchronously, we would use Python’s futures to do so. I suggest the reader to explore this option as a post-lab exercise.

Running gRPC on Docker

Finally, we would want to run our gRPC server on a Docker container. That is a very simple task to do.

First, let’s create a Dockerfile like the following:

FROM grpc/python:1.0-onbuild
CMD [ "python", "./gRPC_server.py" ]

Yup, that’s all! This is a official image from gRPC which makes a pip install on a requirements file and adds the current directory on the container, so we don’t need to add the files ourselves. Let’s build the container:

docker build -t alexandreesl/grpc-lab .

And finally, launch it with our image:

docker run --rm -p 50051:50051 alexandreesl/grpc-lab

If we run again the client, we will see that the server was successfully started. If the reader want, you can also start the container directly by a image I created on Docker Hub for this lab, already built with the source code from our lab. To pull the image, just type the following:

docker pull alexandreesl/grpc-lab

Conclusion

And so we concludes another journey on our great world of technology. I hope I could help the reader to understand what is gRPC and how it can be used to improve our capacity on high demanding API scenarios. Thank you for following me on this post, see you next time.

Continue reading

Hands-on: Using Google API to make searches on your applications

Standard

Welcome, dear reader, to another post of my blog. On this post, we will learn to use Google’s custom search API. With this API, you can make searches using Google’s infrastructure, enriching searching business features, like a web crawler, for example.

Pre-steps

Before we start coding, we need to create the keys to make our authentication with the API. One key is the API key itself and the other one is the search engine key. A search engine key is a key to a search engine you create to pre-filter the types of domains you want to make for your searches, so you dont end up searching sites in chinese, for example, if your application only want sites from England.

To start, access the site https://console.developers.google.com. After inputting our credentials, we get to the main site, where we can create a project, activate/deactivate APIs and generate a API key for the project. This tutorial from Google explain how to create API keys.

After that, we need to create the search engine key, on the site https://www.google.com/cse/all. We can follow this tutorial from Google to create the key.

Hands-on

On this hands-on, we will use Eclipse Luna and Maven 3.2.1. First, create a Maven project, without a archetype:

After creating our project, we add the dependencies. Instead of offering a Java library for the consumption, Google’s API consists of a URL, which is called by a simple GET execution, and returns a JSON structure. For the return, we will use a JSON API we used on our previous post. First, we add the following dependencies in our pom.xml:

<dependencies>
<dependency>
<groupId>javax.json</groupId>
<artifactId>javax.json-api</artifactId>
<version>1.0</version>
</dependency>
<dependency>
<groupId>org.glassfish</groupId>
<artifactId>javax.json</artifactId>
<version>1.0.4</version>
</dependency>
<dependency>
<groupId>org.jsoup</groupId>
<artifactId>jsoup</artifactId>
<version>1.7.2</version>
</dependency>
</dependencies>

Finally, with the dependencies included, we write our code. In this example, we will make a call to the API for a search with the string “java+android”. The API has a limit usage of 100 results per search – in the free mode -, and uses a pagination format of 10 results per page, so we will make 10 calls to the API. The following code make our example:

package com.technology.alexandreesl;

import java.io.BufferedReader;
import java.io.InputStreamReader;
import java.io.StringReader;
import java.net.HttpURLConnection;
import java.net.URL;

import javax.json.Json;
import javax.json.stream.JsonParser;
import javax.json.stream.JsonParser.Event;

public class GoogleAPIJava {

final static String apiKey = “<insert your API Key here>”;
final static String customSearchEngineKey = “<insert your search engine key here>”;

// base url for the search query
final static String searchURL = “https://www.googleapis.com/customsearch/v1?&#8221;;

public static void main(String[] args) {

int inicio = 1;

int contador = 0;

while (contador < 10) {

System.out
.println(“***************** SEARCH **************************”);
System.out.println(“”);

String result = “”;

result = read(“java+android”, inicio, 10);

JsonParser parser = Json.createParser(new StringReader(result));

while (parser.hasNext()) {
Event event = parser.next();

if (event == Event.KEY_NAME) {

if (parser.getString().equals(“htmlTitle”)) {
Event value = parser.next();

if (value == Event.VALUE_STRING)
System.out.println(“Title (HTML): ”
+ parser.getString());
}

if (parser.getString().equals(“link”)) {

Event value = parser.next();

if (value == Event.VALUE_STRING)
System.out.println(“Link: ” + parser.getString());
}

}

}

inicio = inicio + 10;

contador++;

System.out
.println(“**************************************************”);

}

}

private static String read(String qSearch, int start, int numOfResults) {
try {

String toSearch = searchURL + “key=” + apiKey + “&cx=”
+ customSearchEngineKey + “&q=”;

toSearch += qSearch;

toSearch += “&alt=json”;

toSearch += “&start=” + start;

toSearch += “&num=” + numOfResults;

URL url = new URL(toSearch);
HttpURLConnection connection = (HttpURLConnection) url
.openConnection();
BufferedReader br = new BufferedReader(new InputStreamReader(
connection.getInputStream()));
String line;
StringBuffer buffer = new StringBuffer();
while ((line = br.readLine()) != null) {
buffer.append(line);
}
return buffer.toString();
} catch (Exception e) {
e.printStackTrace();
}
return null;
}

}

As we can see above, we make use of the java.net standard classes to make the calls. Using counters to control the calls for the API. The result when we run the program is a list of sites for the search string printed on the console:

***************** SEARCH **************************

Title (HTML): Java Manager; Emulate <b>Java</b> – <b>Android</b> Apps on Google Play
Link: https://play.google.com/store/apps/details?id=com.java.manager
Title (HTML): How do I get <b>Java</b> for Mobile device?
Link: https://www.java.com/en/download/faq/java_mobile.xml
Title (HTML): AIDE – <b>Android</b> IDE – <b>Java</b>, C++ – <b>Android</b> Apps on Google Play
Link: https://play.google.com/store/apps/details?id=com.aide.ui
Title (HTML): Como obtenho o <b>Java</b> para Dispositivos Móveis?
Link: https://www.java.com/pt_BR/download/faq/java_mobile.xml
Title (HTML): Download <b>java</b> for <b>android</b> tablet – <b>Android</b> – <b>Android</b> Smartphones
Link: http://www.tomsguide.com/forum/id-1608121/download-java-android-tablet.html
Title (HTML): <b>java</b>.lang | <b>Android</b> Developers
Link: http://developer.android.com/reference/java/lang/package-summary.html
Title (HTML): Comparison of <b>Java</b> and <b>Android</b> API – Wikipedia, the free <b>…</b>
Link: http://en.wikipedia.org/wiki/Comparison_of_Java_and_Android_API
Title (HTML): Learn <b>Java</b> for <b>Android</b> Development: Introduction to <b>Java</b> – Tuts+ <b>…</b>
Link: http://code.tutsplus.com/tutorials/learn-java-for-android-development-introduction-to-java–mobile-2604
Title (HTML): <b>java</b>.text | <b>Android</b> Developers
Link: http://developer.android.com/reference/java/text/package-summary.html
Title (HTML): Apostila <b>Java</b> – Desenvolvimento Mobile com <b>Android</b> | K19
Link: http://www.k19.com.br/downloads/apostilas/java/k19-k41-desenvolvimento-mobile-com-android
**************************************************
***************** SEARCH **************************

Title (HTML): How can I access a <b>Java</b>-based website on an <b>Android</b> phone?
Link: http://www.makeuseof.com/answers/access-javabased-website-android-phone/
Title (HTML): Introduction to <b>Java</b> Variables | Build a Simple <b>Android</b> App (retired <b>…</b>
Link: http://teamtreehouse.com/library/build-a-simple-android-app/getting-started-with-android/introduction-to-java-variables-2
Title (HTML): <b>Java</b> Basics for <b>Android</b> Development – Part 1 – Treehouse Blog
Link: http://blog.teamtreehouse.com/java-basics-for-android-development-part-1
Title (HTML): GC: <b>android</b> – GrepCode <b>Java</b> Project Source
Link: http://grepcode.com/project/repository.grepcode.com/java/ext/com.google.android/android
Title (HTML): <b>Java</b> Essentials for <b>Android</b>
Link: https://www.udemy.com/java-essentials-for-android/
Title (HTML): How to Get <b>Java</b> on <b>Android</b>: 10 Steps (with Pictures) – wikiHow
Link: http://www.wikihow.com/Get-Java-on-Android
Title (HTML): Learn <b>Android</b> 4.0 Programming in <b>Java</b>
Link: https://www.udemy.com/android-tutorial/
Title (HTML): Trending <b>Java</b> repositories on GitHub today · GitHub
Link: https://github.com/trending?l=java
Title (HTML): Developing for <b>Android</b> in Eclipse: R.<b>java</b> not generating – Stack <b>…</b>
Link: http://stackoverflow.com/questions/2757107/developing-for-android-in-eclipse-r-java-not-generating
Title (HTML): Cling – <b>Java</b>/<b>Android</b> UPnP library and tools
Link: http://4thline.org/projects/cling/
**************************************************
***************** SEARCH **************************

Title (HTML): Getting Started | <b>Android</b> Developers
Link: https://developer.android.com/training/
Title (HTML): <b>Java</b> API – <b>Android</b> | Vuforia Developer Portal
Link: https://developer.vuforia.com/resources/api/main
Title (HTML): <b>Java</b> Programming for <b>Android</b> Developers For Dummies: Burd <b>…</b>
Link: http://www.amazon.com/Java-Programming-Android-Developers-Dummies/dp/1118504380
Title (HTML): <b>Android</b> Quickstart – Firebase
Link: https://www.firebase.com/docs/android/quickstart.html
Title (HTML): Learn <b>Java</b> for <b>Android</b> Development: Jeff Friesen: 9781430264545 <b>…</b>
Link: http://www.amazon.com/Learn-Java-Android-Development-Friesen/dp/1430264543
Title (HTML): Unity – Manual: Building Plugins for <b>Android</b>
Link: http://docs.unity3d.com/Manual/PluginsForAndroid.html
Title (HTML): Eclipse, <b>Android</b> and <b>Java</b> training and support
Link: http://www.vogella.com/
Title (HTML): AIDE – <b>Android Java</b> IDE download – Baixaki
Link: http://www.baixaki.com.br/android/download/aide-android-java-ide.htm
Title (HTML): <b>Java</b> Multi-Platform and <b>Android</b> SDK | Philips Hue API
Link: http://www.developers.meethue.com/documentation/java-multi-platform-and-android-sdk
Title (HTML): <b>Android</b> Client Tutorial – <b>Java</b> — Google Cloud Platform
Link: https://cloud.google.com/appengine/docs/java/endpoints/getstarted/clients/android/
**************************************************
***************** SEARCH **************************

Title (HTML): Gradle Plugin User Guide – <b>Android</b> Tools Project Site
Link: http://tools.android.com/tech-docs/new-build-system/user-guide
Title (HTML): Where is a download for <b>java</b> for <b>android</b> tablet? – Download <b>…</b>
Link: http://www.tomshardware.com/forum/52818-34-where-download-java-android-tablet
Title (HTML): Download <b>android java</b>
Link: http://www.softonic.com.br/s/android-java
Title (HTML): Binding a <b>Java</b> Library | Xamarin
Link: http://developer.xamarin.com/guides/android/advanced_topics/java_integration_overview/binding_a_java_library_(.jar)/
Title (HTML): <b>java</b>-ide-droid – JavaIDEdroid allows you to create native <b>Android</b> <b>…</b>
Link: http://code.google.com/p/java-ide-droid/
Title (HTML): Code Style Guidelines for Contributors | <b>Android</b> Developers
Link: https://source.android.com/source/code-style.html
Title (HTML): Eclipse Downloads
Link: https://eclipse.org/downloads/
Title (HTML): Open source <b>Java</b> for <b>Android</b>? Don’t bet on it | InfoWorld
Link: http://www.infoworld.com/article/2615512/java/open-source-java-for-android–don-t-bet-on-it.html
Title (HTML): Make your First <b>Android</b> App! – YouTube
Link: http://www.youtube.com/watch?v=A_qaarY4_lY
Title (HTML): Runtime for <b>Android</b> apps – BlackBerry Developer
Link: http://developer.blackberry.com/android/
**************************************************
***************** SEARCH **************************

Title (HTML): <b>Java</b> Mobile <b>Android</b> Basic Course Online
Link: http://www.vtc.com/products/javamobileandroidbasic.htm
Title (HTML): <b>Android</b> Game Development Tutorial – Kilobolt
Link: http://www.kilobolt.com/game-development-tutorial.html
Title (HTML): Learn <b>Java</b> for <b>Android</b> Development, 3rd Edition – Free Download <b>…</b>
Link: http://feedproxy.google.com/~r/IT-eBooks/~3/oITagjK1kYU/
Title (HTML): Cursos de <b>Android</b> e iOS | Caelum
Link: http://www.caelum.com.br/cursos-mobile/
Title (HTML): Autobahn|<b>Android</b> Documentation — AutobahnAndroid 0.5.2 <b>…</b>
Link: http://ottogrib.appspot.com/autobahn.ws/android
Title (HTML): Dagger ‡ A fast dependency injector for <b>Android</b> and <b>Java</b>.
Link: http://google.github.com/dagger/
Title (HTML): Dagger
Link: http://square.github.com/dagger/
Title (HTML): Setup – google-api-<b>java</b>-client – Download and Setup Instructions <b>…</b>
Link: https://code.google.com/p/google-api-java-client/wiki/Setup
Title (HTML): How to Write a ‘Hello World!’ app for <b>Android</b>
Link: http://www.instructables.com/id/How-to-Write-a-Hello-World-app-for-Android/
Title (HTML): The real history of <b>Java</b> and <b>Android</b>, as told by Google | ZDNet
Link: http://www.zdnet.com/article/the-real-history-of-java-and-android-as-told-by-google/
**************************************************
***************** SEARCH **************************

Title (HTML): Microsoft Releases SignalR SDK for <b>Android</b>, <b>Java</b> — Visual Studio <b>…</b>
Link: http://visualstudiomagazine.com/articles/2014/03/07/signalr-sdk-for-android-and-java.aspx
Title (HTML): <b>Android</b> Game Tutorials | <b>Java</b> Code Geeks
Link: http://www.javacodegeeks.com/tutorials/android-tutorials/android-game-tutorials/
Title (HTML): libgdx
Link: http://libgdx.badlogicgames.com/
Title (HTML): Buck: An <b>Android</b> (and <b>Java</b>!) build tool
Link: https://www.diigo.com/04w2jy
Title (HTML): Google copied <b>Java</b> in <b>Android</b>, expert says | Computerworld
Link: http://www.computerworld.com/article/2512514/government-it/google-copied-java-in-android–expert-says.html
Title (HTML): Reinventing Mobile Development (mobile app development mobile <b>…</b>
Link: http://www.codenameone.com/
Title (HTML): Understanding R.<b>java</b>
Link: http://knowledgefolders.com/akc/display?url=DisplayNoteIMPURL&reportId=2883&ownerUserId=satya
Title (HTML): Download <b>Java</b> Programming for <b>Android</b> Developers For Dummies <b>…</b>
Link: http://kickasstorrentsproxy.com/java-programming-for-android-developers-for-dummies-epub-pdf-t8208814.html
Title (HTML): Court sides with Oracle over <b>Android</b> in <b>Java</b> patent appeal – CNET
Link: http://www.cnet.com/news/court-sides-with-oracle-over-android-in-java-patent-appeal/
Title (HTML): Google Play <b>Android</b> Developer API Client Library for <b>Java</b> – Google <b>…</b>
Link: https://developers.google.com/api-client-library/java/apis/androidpublisher/v1
**************************************************
***************** SEARCH **************************

Title (HTML): Tape – A collection of queue-related classes for <b>Android</b> and <b>Java</b> by <b>…</b>
Link: http://shahmehulv.appspot.com/square.github.io/tape/
Title (HTML): <b>Android</b> Platform Guide
Link: http://cordova.apache.org/docs/en/4.0.0/guide_platforms_android_index.md.html
Title (HTML): OrmLite – Lightweight Object Relational Mapping (ORM) <b>Java</b> Package
Link: http://ormlite.com/
Title (HTML): <b>Android</b> Ported to C# | Xamarin Blog
Link: http://blog.xamarin.com/android-in-c-sharp/
Title (HTML): Tutorials | AIDE – <b>Android</b> IDE
Link: https://www.android-ide.com/tutorials.html
Title (HTML): All Tutorials on Mkyong.com
Link: http://www.mkyong.com/all-tutorials-on-mkyong-com/
Title (HTML): Top 10 <b>Android</b> Apps and IDE for <b>Java</b> Coders and Programmers
Link: https://blog.idrsolutions.com/2014/12/android-apps-ide-for-java-coder-programmers/
Title (HTML): <b>Java Android</b> developer information, news, and how-to advice <b>…</b>
Link: http://www.javaworld.com/category/java-android-developer
Title (HTML): Google <b>Android</b> e <b>Java</b> Micro Edition (ME)
Link: http://www.guj.com.br/forums/show/14.java
Title (HTML): <b>Java</b> &amp; <b>Android</b> Obfuscator | DashO
Link: http://www.preemptive.com/products/dasho/overview
**************************************************
***************** SEARCH **************************

Title (HTML): Using a Custom Set of <b>Java</b> Libraries In Your RAD Studio <b>Android</b> <b>…</b>
Link: http://docwiki.embarcadero.com/RADStudio/XE7/en/Using_a_Custom_Set_of_Java_Libraries_In_Your_RAD_Studio_Android_Apps
Title (HTML): 50. <b>Android</b> (DRD) – <b>java</b> – CERT Secure Coding Standards
Link: https://www.securecoding.cert.org/confluence/pages/viewpage.action?pageId=111509535
Title (HTML): Gameloft: Top Mobile Games for iOS, <b>Android</b>, <b>Java</b> &amp; more
Link: http://www.gameloft.com/
Title (HTML): <b>Android</b> and <b>Java</b> Developers: We Have a SignalR SDK for You!
Link: http://msopentech.com/blog/2014/03/06/android-java-developers-signalr-sdk/
Title (HTML): <b>Java</b> Swing UI on iPad, iPhone and <b>Android</b>
Link: http://www.creamtec.com/products/ajaxswing/solutions/java_swing_ui_on_ipad.html
Title (HTML): TeenCoder <b>Java</b> Series: Computer Programming Courses for Teens!
Link: http://www.homeschoolprogramming.com/teencoder/teencoder_jv_series.php
Title (HTML): Mixpanel <b>Java</b> API Overview – Mixpanel | Mobile Analytics
Link: https://mixpanel.com/help/reference/java
Title (HTML): AN 233 <b>Java</b> D2xx for <b>Android</b> API User Manual – FTDI
Link: http://www.ftdichip.com/Documents/AppNotes/AN_233_Java_D2XX_for_Android_API_User_Manual.pdf
Title (HTML): Xtend – Modernized <b>Java</b>
Link: http://eclipse.org/xtend/
Title (HTML): ProGuard
Link: http://freecode.com/urls/9ab4c148025d25c6eccd84906efb2c05
**************************************************
***************** SEARCH **************************

Title (HTML): FOSS Patents: Oracle wins <b>Android</b>-<b>Java</b> copyright appeal: API code <b>…</b>
Link: http://www.fosspatents.com/2014/05/oracle-wins-android-java-copyright.html
Title (HTML): <b>java android</b> 4.1.1 free download
Link: http://en.softonic.com/s/java-android-4.1.1
Title (HTML): Four reasons to stick with <b>Java</b>, and four reasons to dump it <b>…</b>
Link: http://www.javaworld.com/article/2689406/java-platform/four-reasons-to-stick-with-java-and-four-reasons-to-dump-it.html
Title (HTML): <b>Java</b> Programming for <b>Android</b> Developers For Dummies Cheat Sheet
Link: http://www.dummies.com/how-to/content/java-programming-for-android-developers-for-dummie.html
Title (HTML): Twitter4J – A <b>Java</b> library for the Twitter API
Link: http://twitter4j.org/
Title (HTML): Ignite Realtime: Smack API
Link: http://www.igniterealtime.org/projects/smack/
Title (HTML): <b>Java</b> Programming for <b>Android</b> Developers For Dummies
Link: http://allmycode.com/Java4Android
Title (HTML): Oracle ADF Mobile
Link: http://www.oracle.com/technetwork/developer-tools/adf-mobile/overview/adfmobile-1917693.html
Title (HTML): Introduction of How <b>Android</b> Works for <b>Java</b> Programmers
Link: http://javarevisited.blogspot.com/2013/06/introduction-of-how-android-works-Java-programmers.html
Title (HTML): Download <b>java</b> emulator for <b>Android</b> | JavaEmulator.com
Link: http://www.javaemulator.com/android-java-emulator.html
**************************************************
***************** SEARCH **************************

Title (HTML): Google hauls <b>Java</b>-on-<b>Android</b> spat into US Supreme Court • The <b>…</b>
Link: http://go.theregister.com/feed/www.theregister.co.uk/2014/10/09/google_takes_javaonandroid_case_to_supreme_court/
Title (HTML): <b>Android</b> SDK for Realtime Apps
Link: http://www.pubnub.com/docs/java/android/android-sdk.html
Title (HTML): Como Obter o <b>Java</b> no <b>Android</b>: 4 Passos (com Imagens)
Link: http://pt.wikihow.com/Obter-o-Java-no-Android
Title (HTML): If <b>Android</b> is so hot, why has <b>Java</b> ME overtaken it?
Link: http://fortune.com/2012/01/01/if-android-is-so-hot-why-has-java-me-overtaken-it/
Title (HTML): <b>Android</b> tutorial
Link: http://www.tutorialspoint.com/android/
Title (HTML): What’s New in IntelliJ IDEA 14
Link: https://www.jetbrains.com/idea/whatsnew/
Title (HTML): <b>Android</b> OnClickListener Example | Examples <b>Java</b> Code Geeks
Link: http://examples.javacodegeeks.com/android/core/view/onclicklistener/android-onclicklistener-example/
Title (HTML): JTwitter – the <b>Java</b> library for the Twitter API : Winterwell Associates <b>…</b>
Link: http://www.winterwell.com/software/jtwitter.php
Title (HTML): RL SYSTEM – Cursos Online de <b>Android</b>, .NET, <b>Java</b>, PHP, ASP <b>…</b>
Link: http://www.rlsystem.com.br/
Title (HTML): samples/ApiDemos/src/com/example/<b>android</b>/apis/app <b>…</b>
Link: https://android.googlesource.com/platform/development/+/master/samples/ApiDemos/src/com/example/android/apis/app/FragmentRetainInstance.java
**************************************************

Conclusion

And so we concluded our hands-on. With a simple usage, Google’s custom search API offers a simple but powerful tool in the belt of every developer who need to use a search engine of the internet in his solutions. Thank you for reading, until next time.

Source-code (Github)

Hands-on Angularjs: Building single-page applications with Javascript

Standard

Welcome to another post from my blog. In this post, we’ll talk about a web framework that has become popular in the construction of single-page web applications: Angularjs. But after all, what is a single-page application?

Single-page applications

Single-page applications, as the name implies, consist of applications where only a single “page” – or as we also call, HTML document – is submitted to the client, and after this initial load, only fragments of the page are reloaded, by Ajax requests, without ever making a full page reload. The main advantage we have in this web application model is that, due to minimizing the data traffic between the client and the server, it provides the user with a highly dynamic application, with low “latency” between user actions on the interface. A point of attention, however, is that in this application model, much of the “weight” of the application processing falls to the client side, then the device’s capabilities where the user is accessing the application can be a problem for the adoption of the model, especially if we are talking about applications accessed on mobile devices.

Developed by Google, Angularjs brought features that allow you to build in a well structured way applications in single-page model, through the use of javascript as an extension built on top of HTML pages. One of the advantages of the framework is that it integrates seamlessly into HTML, allowing the developer team to, for example, reuse the pages of a prototype made by a web designer.

Architecture

The framework architecture works with the concept of been a html extension of the page to which it is linked. As a javascript library, imported within the pages, which through the use of policies – kind of attributes that are embedded within their own html tags, usually with the prefix “NG” – performs the compilation of all the code belonging to the framework generating dynamic code – html, css and javascript – that the user use through his browser. For readers who are interested in knowing more deeply the architecture behind the framework, the presentation below speaks in detail about this topic:

Layout

Although the framework has high flexibility in the construction of layouts due to the use of pure html, it lacks ready layout options, so to make the application with a more pleasant graphical interface, it enters the bootstrap, providing CSS styles – plus pre-build behavior in javacript and dynamic html – that enable an even richer layout for the application. At the end of this post, beyond the official angularjs site, you can also access the link to the official site of the bootstrap.

The MVC model

In the web world, is well known the pattern MVC (Model – View – Controller). In this pattern, we define that the web application is defined in 3 layers with different responsibilities:

View: In this layer, we have the code related to the presentation to the end user, with pages and rules related to navigation, such as control of the flags of a register in the “wizard” format, for example.

Controller: This layer is the code that bridges between the navigation and the source of application data, represented by the model layer. Processing and business rules typically belong to this layer.

Model: In this layer is the code responsible for performing the persistence of the application data. In a traditional web application, we commonly have a DBMS as a data source.

Speaking in the context of angularjs, as we see below, we have the view layer represented by the html pages. These pages communicate with the controller layer through policies explained in the beginning of our post, invoking the controllers of the framework, consisting of a series of javascript functions encoded by the developer. These functions use a binding layer, provided by the framework, called $ scope, which is populated by the controller and displayed by the view, representing the model layer. Typically, in the architecture of a angularjs system, we have the model layer being filled through REST services.

The figure below illustrates the interaction between these layers:


angularjs_mvc

Hands-on

For this hands-on, we will use the Wildfly 8.1.0 server, angularjs and the bootstrap. At the time of this post, the latest version (stable) of angularjs is 1.2.26 and for the bootstrap is 3.2.0. As IDE, I am using Eclipse Luna.

First, the reader must create a project of type “Dynamic Web Project” by selecting the wizard image below. In fact, it would be perfectly possible to use static web project as a project, but we’ll use the dynamic only to facilitate the deploy on the server.

Following the wizard, remember to select the runtime Wildfly, as indicated below, and select the checkbox that calls for the creation of the descriptor “web.xml” on the last page of the wizard.

At the end, we will have a project structure like the one below:

As a last step of project configuration, we will add the project in the automatically deployed application list on our Wildfly server. To do this, select the server from the perspective of servers, select the “add or remove” and move the application to the list of configured applications, as follows:

Including the angularjs and bootstrap on the application

To include the angular and the bootstrap in our application, simply include the contents thereof, consisting of js files, css, etc inside the folder “webcontent” generating the project structure below:

PS: This structure aims only to provide a quick and easy way to set the environment for the realization of our learning. In a real application, the developer has the freedom to not include all angular files, including only those whose resources will be used in the project.

Starting our development, we will create a simple page containing a single page application that consists of a list of tasks, with the option of new tasks and filtering tasks already completed. Keep in mind that the goal of this small application is only to show the basic structure of angularjs. In a real application, the js code should be structured in directories, ensuring readability and maintainability of the code.

Thus, we come to the implementation. To deploy it, we will create an html page called “index.html”, and put the code below:

<!DOCTYPE html>
<html ng-app=”todoApp”>
<head>
<title>Tarefas</title>
<link href=”css/bootstrap.css” rel=”stylesheet” />
<link href=”css/bootstrap-theme.css” rel=”stylesheet” />
<script src=”angular.js”></script>

<script>
var model = {
user: “Alexandre”,
items: [{ action: “Ir á padaria”, done: false },
{ action: “Comprar remédios”, done: false },
{ action: “Pagar contas”, done: true },
{ action: “Ligar para Ana”, done: false }]
};

var todoApp = angular.module(“todoApp”, []);

todoApp.filter(“checkedItems”, function () {
return function (items, showComplete) {
var resultArr = [];
angular.forEach(items, function (item) {

if (item.done == false || showComplete == true) {
resultArr.push(item);
}
});
return resultArr;
}
});

todoApp.controller(“ToDoCtrl”, function ($scope) {
$scope.todo = model;

$scope.addNewItem = function(actionText) {
$scope.todo.items.push({ action: actionText, done: false});
}

});
</script>

</head>
<body ng-controller=”ToDoCtrl”>
<div class=”page-header”>
<h1>
Tarefas de {{todo.user}}
</h1>
</div>
<div class=”panel”>
<div class=”input-group”>
<input class=”form-control” ng-model=”actionText” />
<span class=”input-group-btn”>
<button class=”btn btn-default”
ng-click=”addNewItem(actionText)”>Add</button>
</span>
</div>

<table class=”table table-striped”>
<thead>
<tr>
<th>Description</th>
<th>Done</th>
</tr>
</thead>
<tbody>
<tr ng-repeat=
“item in todo.items | checkedItems:showComplete | orderBy:’action'”>
<td>{{item.action}}</td>
<td><input type=”checkbox” ng-model=”item.done” /></td>
</tr>
</tbody>
</table>

<div class=”checkbox-inline”>
<label><input type=”checkbox” ng_model=”showComplete”> Show Complete</label>
</div>
</div>

</body>
</html>

As we can see, we have a simple html page. First, insert the policy “ng-app”, which initializes the framework on the page, and import the files needed for the operation of the angular and the bootstrap:

<html ng-app=”todoApp”>
<head>
<title>Tarefas</title>
<link href=”css/bootstrap.css” rel=”stylesheet” />
<link href=”css/bootstrap-theme.css” rel=”stylesheet” />
<script src=”angular.js”></script>

Following is the creation of a module. A angularjs module consists of other components such as filters and controllers, constituting a unit similar to a package that can be imported into other application modules. For the initial data source, we put a JSON structure in a JavaScript variable, which is inserted into the binding layer later. In addition, we also have to create a filter. Filters, as the name implies, are created to provide a means of filtering the data of a listing. Later on we will see that use in practice:

<script>
var model = {
user: “Alexandre”,
items: [{ action: “Ir á padaria”, done: false },
{ action: “Comprar remédios”, done: false },
{ action: “Pagar contas”, done: true },
{ action: “Ligar para Ana”, done: false }]
};

var todoApp = angular.module(“todoApp”, []);

todoApp.filter(“checkedItems”, function () {
return function (items, showComplete) {
var resultArr = [];
angular.forEach(items, function (item) {

if (item.done == false || showComplete == true) {
resultArr.push(item);
}
});
return resultArr;
}
});

Moving on we have the construction of the controller, which as already explained, is responsible for performing the interaction with the binding layer, beyond the call to external resources to the page, such as REST services. In our example, we link the JSON structure created earlier with our binding layer and create a function for adding new tasks to a action:

todoApp.controller(“ToDoCtrl”, function ($scope) {
$scope.todo = model;

$scope.addNewItem = function(actionText) {
$scope.todo.items.push({ action: actionText, done: false});
}

});
</script>

Once we have our populated binding, it is easy for us to display its values, as in the example below, where we show the value of  “user”. We also define a form to our inclusion of tasks:

<body ng-controller=”ToDoCtrl”>
<div class=”page-header”>
<h1>
Tarefas de {{todo.user}}
</h1>
</div>
<div class=”panel”>
<div class=”input-group”>
<input class=”form-control” ng-model=”actionText” />
<span class=”input-group-btn”>
<button class=”btn btn-default”
ng-click=”addNewItem(actionText)”>Add</button>
</span>
</div>

Finally, we have the proper view of the tasks. To do this, we use the “ng-repeat” policy. The reader will notice that we have made use of our filter, and we ask the angularjs to order our list by the “action” value. In addition, we can also see the binding for changing the filter, through the checkboxes to enable / disable filtering, in addition to the marking of completed tasks

<table class=”table table-striped”>
<thead>
<tr>
<th>Description</th>
<th>Done</th>
</tr>
</thead>
<tbody>
<tr ng-repeat=
“item in todo.items | checkedItems:showComplete | orderBy:’action'”>
<td>{{item.action}}</td>
<td><input type=”checkbox” ng-model=”item.done” /></td>
</tr>
</tbody>
</table>

<div class=”checkbox-inline”>
<label><input type=”checkbox” ng_model=”showComplete”> Show Complete</label>
</div>
</div>

The final screen in operation can be seen below:

Conclusion

And so we conclude our post on angularjs. With design flexibility and an easy learning structure, its adoption as well as the single page applications model is a powerful tool that every web developer should have in his pocket knife options. Thanks to everyone who supported me in this post, until next time.

Continue reading