
Hi, dear readers! Welcome to my blog. On this post, we will take a tour on a open source project developed by Yelp, called Elastalert. Focused on enriching Elasticsearch’s role as a monitoring tool, it allow us to query Elasticsearch, sending alerts to different types of tools, such as e-mail boxes, Telegram chats, JIRA issues and more. So, without further delay, let’s go deep on the tool!
Set up
In order to set up Elastalert, we need to clone the project’s Git repository and install it with Python. If the reader doesn’t have Python or Git installed, I recommend following the instructions here for Python and here for Git. For this tutorial, I am using a Unix OS, but the instructions are similar for other environments such as Linux. Also, on this tutorial I am using virtulenv, in order to keep my Python interpreter “clean”. The reader can find instructions to install virtualenv here.
To display the alerts, we will use a Telegram channel, which will receive alerts sent by a Telegram bot. In order to prepare the bot, we need a Telegram account and use the Bot Father (@BotFather) to create the bot, then create a public channel on telegram and associate the bot on the channel’s admins. The instructions to make this configurations can be found here. In order to easy the steps for the reader, I leave the bot created for this lab (@elastalerthandson) published for anyone who wants to use this bot on his own telegram channels for testing!
With all the tools installed and ready, let’s begin by cloning the Elastalert Git repository. To do this, we run the following command, on the folder of our choice:
git clone https://github.com/Yelp/elastalert.git
After running the command, we will see that a folder called “elastalert” was created. Before we proceed, we will also create a virtualenv environment, where we will install Elastalert. We do this by running:
virtualenv virtualenvelastalert
After creating the virtual environment – which will create a folder called “virtualenvelastalert” -, we need to activate it before we proceed with the install. To do this, we run the following command, assuming the reader is on the same folder of the previous command:
source virtualenvelastalert/bin/activate
After activating, we will notice that the name of our virtual environment is now written as a prefix on the shell, meaning that it is activated. Now, to install elastalert, we navigate to the folder created previously by our git clone command and type the following:
python setup.py install
sudo pip install -r requirements.txt
That’s it! Now that we have Elastalert installed, let’s continue the setup by creating the Elasticsearch index that it will be used as a metadata repository by Elastalert.
Creating the metadata index
In order to create Elastalert’s index, we run the command:
elastalert-create-index
The command-line tool will ask us some settings such as the name we want for the index and the ip/port of our Elasticsearch’s cluster. After providing the settings, the tool will create the index, like we can see on the picture bellow: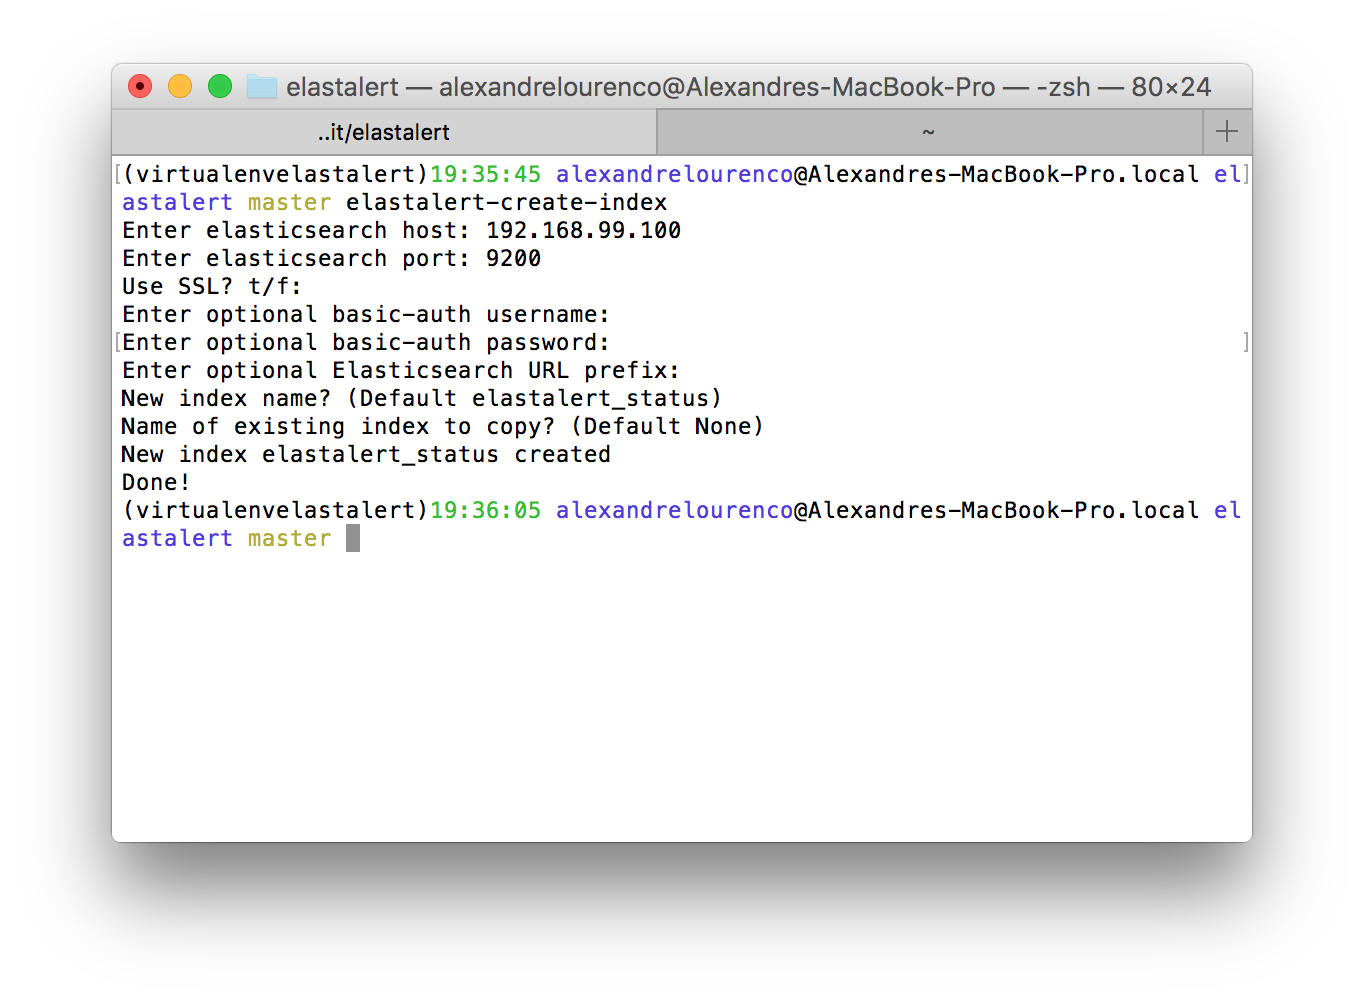 Creating the configuration files
All the configuration on Elastalert is made by YAML files. The main configuration file for the tool is called by default as “config.yaml” and is located on the same folder where we start Elastalert – which we will do in some moments. For our main configuration file, let’s create a file called “config.yaml” like the following:
rules_folder: rules_folder

run_every:
  seconds: 40

buffer_time:
  minutes: 15

es_host: 192.168.99.100

es_port: 9200

writeback_index: elastalert_status

alert_time_limit:
  days: 2
On the config above, we defined:
- The rules_folder property which defines the folder where our rules will be (all YAML files on the folder will be processed);
- The run_every property will make Elastalert to run all the rules on a 40 seconds frequency;
- The buffer_time property will make Elastalert cache the last period of time defined by the range of the property. This approach is used when the queries made on Elasticsearch are not on real time data;
- The host ip of the Elasticsearch’s node used to query the alerts;
- The host port of the Elasticsearch’s node used to query the alerts;
- The index used to store the metadata, that we created on the previous section;
- The maximum period of time Elastalert will hold a alert that the delivery has failed, making retries during the period;
Now, let’s create the “rules_folder” folder and create 3 YAML files, which will hold our rules:
- twitter_flatline.yaml
- twitter_frequency.yaml
- twitter-blacklist.yaml
On this rules, we will test 3 types of rules Elastalert can manage:
- The flatline rule, which will alert when the number of documents find for a search drop bellow a threshold;
- The frequency rule, which will alert when a number of documents for a certain period of time is reached;
- The blacklist rule, which will alert when any document containing a list of words is found on the timeframe collected by the tool;
Of course, there’s other rule types alongside those that we will cover on this lab, like the spike rule that can detect abnormal grows or shrinks on data across a time period, or the whitelist rule, which alert on any documents that contain any words from a list. More information about rules and their types can be found at the references on the end of this post.
For this lab, we will use a elasticsearch index with twitter data. The reader can found more information about how to set up a ELK environment on my ELK series. The Logstash configuration file used on this lab is as follows:
input {
      twitter {
        consumer_key => "XXXXXXXXXXXXXXXXX"
        consumer_secret => "XXXXXXXXXXXXXXXX"
        keywords => ["coca cola","java","elasticsearch","amazon"]
        oauth_token => "XXXXXXXXXXXXXXX"
        oauth_token_secret => "XXXXXXXXXXXXXX"
    }
}


 output {
      stdout { codec => rubydebug }
      elasticsearch {
            hosts => [ "192.168.99.100:9200" ]
            index => "twitter-%{+YYYY.MM.dd}"
        }
}
With our ELK stack set up and running, let’s begin creating the rules. First, we create the frequency rule, by configuring the respective YAML file with the following code:
name: Twitter frequency rule

type: frequency

index: twitter-*

num_events: 3

timeframe:
  minutes: 15

realert:
  hours: 2

filter:
- query:
   query_string:
    query: "message:amazon"


alert:
- "telegram"

telegram_bot_token: 184186982:AAGpJRyWQ2Rb_RcFXncGrJrBrSK7BzoVFU8

telegram_room_id: "@elastalerthandson"
On the following file we configure a frequency rule. The rule is configured by setting the following properties:
- name: This property defines the rule’s name. This property acts as the rule ID;
- type: This property defines the type of rule we are creating;
- index: This property defines the index on Elasticsearch where we want to make the searches;
- num_events: The number of documents necessary to be found in order to fire the alert;
- timeframe: The time period which will be queried to check the rule;
- realert: This property defines the time period that Elastalert will stop realerting the rule after the first match, preventing the users to be flooded with alerts;
- filter: This property is where we configure the query that will be send to Elasticsearch in order to check the rule;
- alert: This property is a list of targets which we want our alerts to be send. On our case, we just defined the telegram target;
- telegram_bot_token: On this property we set the access token from our bot, as received by the Botfather;
- telegram_room_id: On this property we define the id of the channel we want the alerts to be sent;
As we can see, is a very straightforward and simple configuration file. For the flatline config, we configure our respective YAML as follows:
name: Twitter flatline rule

type: flatline

index: twitter-*

threshold: 30

timeframe:
 minutes: 5

realert:
 minutes: 30

use_count_query: true

doc_type: logs

alert:
- "telegram"

telegram_bot_token: 184186982:AAGpJRyWQ2Rb_RcFXncGrJrBrSK7BzoVFU8

telegram_room_id: "@elastalerthandson"
The configuration is pretty much the same of the previous file, with the exception of 3 new properties:
- threshold: This property defines the minimum amount of documents expected for the rule to receive in order that a alert is not needed to be sent;
- use_count_query: This property defines that Elastalert must use the count API from Elasticsearch. This API returns just the number of documents for the rule to be validated, eliminating the need to process the query data;
- doc_type: This property is needed by the count API aforementioned, in order to query the document count for a specific document type;
Finally, let’s configure our final rule, coding the final YAML as follows:
name: Twitter blacklist rule

type: blacklist

index: twitter-*

compare_key: message

blacklist:
- "android"
- "java"

realert:
  hours: 4

filter:
- query:
   query_string:
    query: "*"

alert:
- "telegram"

telegram_bot_token: 184186982:AAGpJRyWQ2Rb_RcFXncGrJrBrSK7BzoVFU8

telegram_room_id: "@elastalerthandson"
On this file, the new properties that we needed to configure are:
- compare_key: This property defines the field on the documents that Elastalert will check the blacklist;
- blacklist: This property is a list of words which Elastalert will compare against the documents in order to check if any document has a blacklisted word;
And that concludes our configuration. Now, let’s run Elastalert!
Running Elastalert
To run Elastalert, all we need to do is run a command like this, on the same folder of our YAML structure – where “config.yaml” is located:
elastalert --start NOW --verbose
On the command above, we set the flag “–start” to define that we want Elastalert to start the measurings from now up and the “–verbose” flag to print all the info log messages.
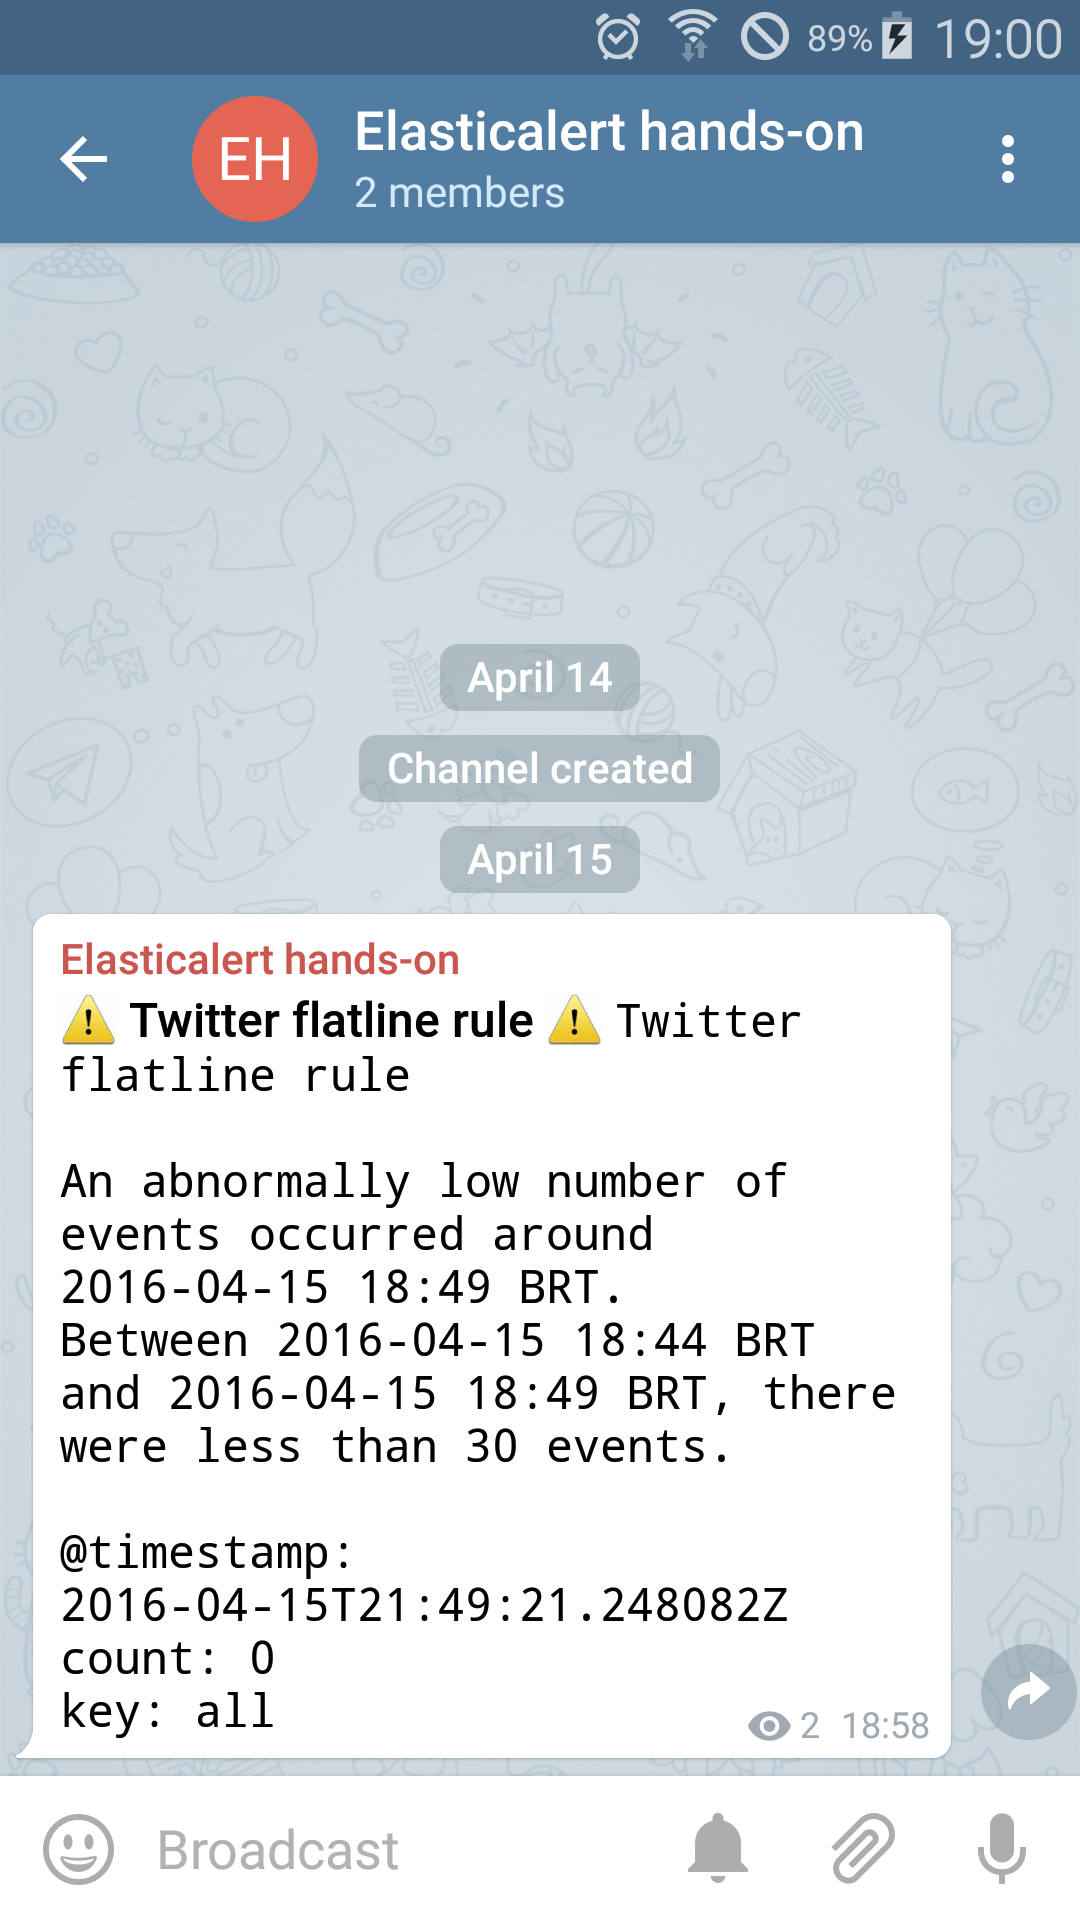
The simplest of the rules to test it out is the flatline rule. All we have to do is wait for about 5 minutes with Elasticsearch running and Logstash stopped – so no documents are streaming. After the wait, we can see on our channel that a alert is received on the channel:
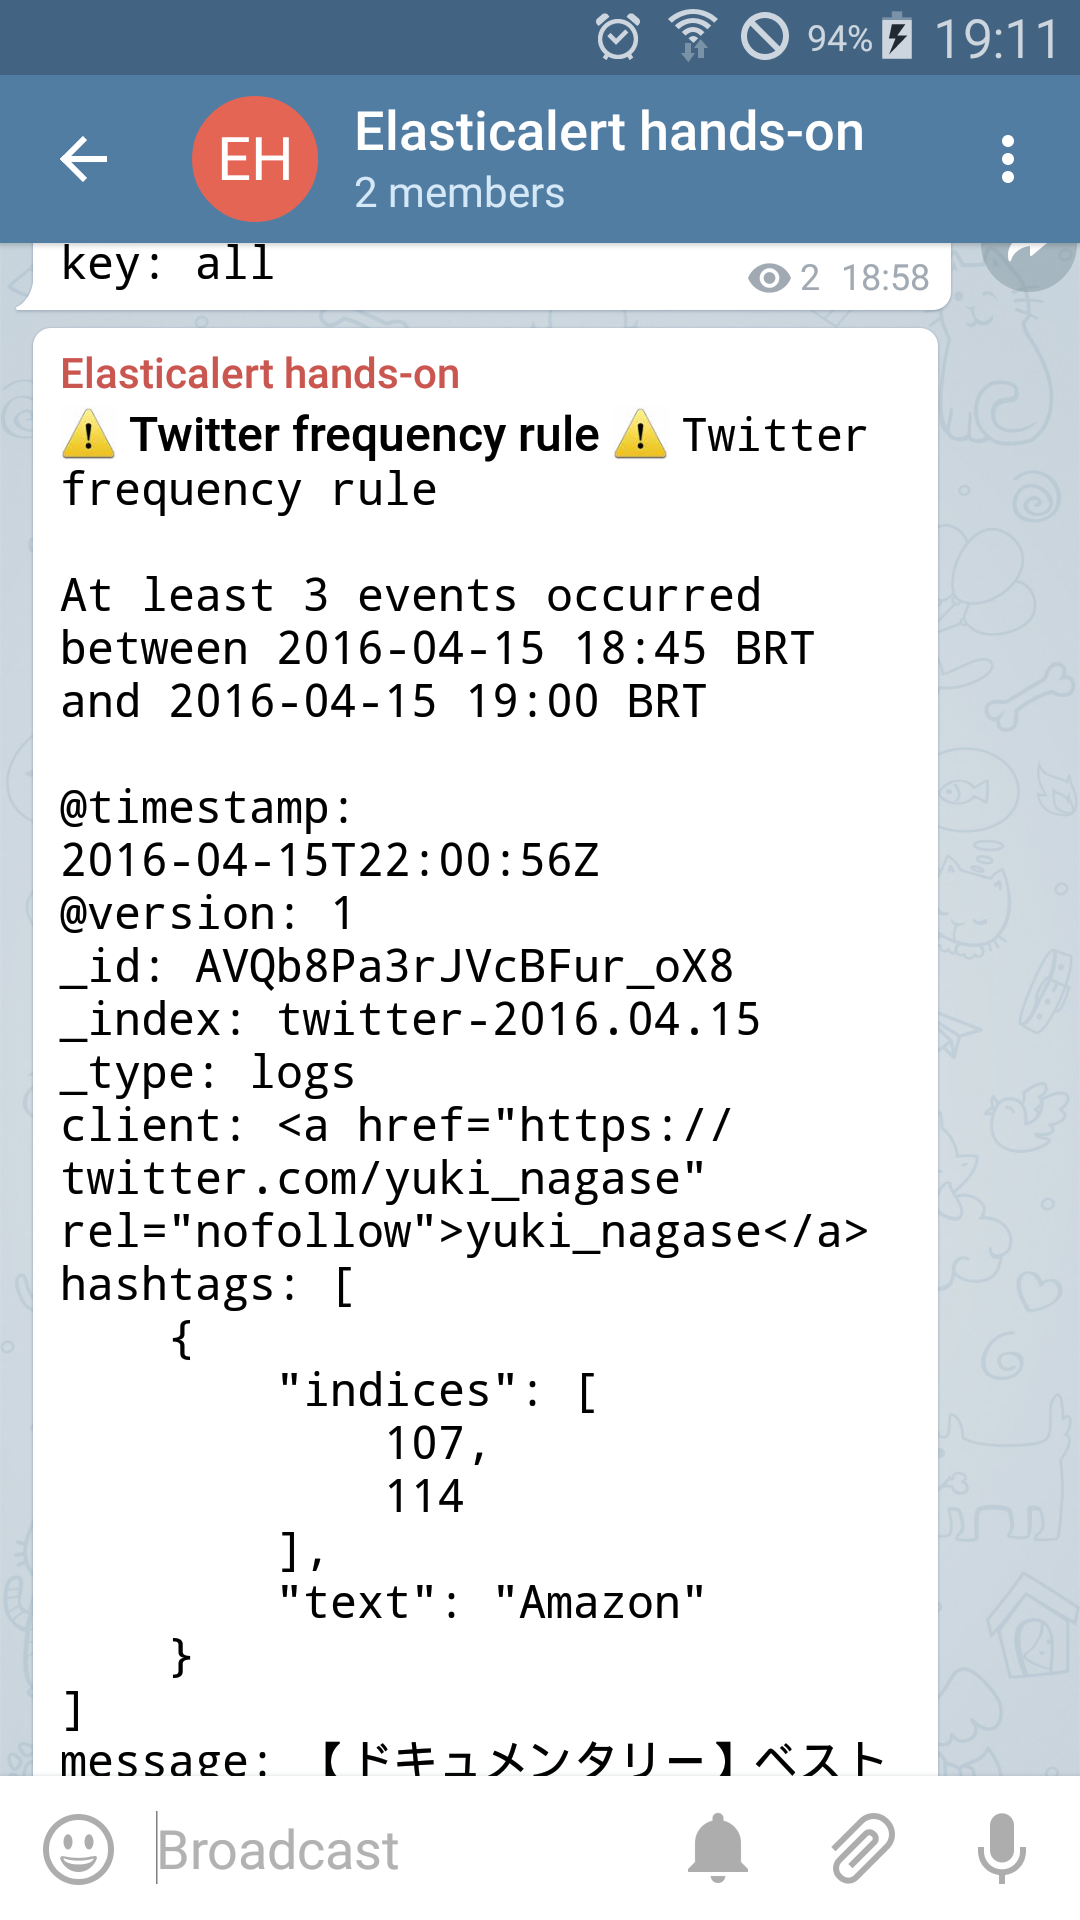
And, as the time passes, we will receive other alerts as well, like the frequency alert:
Conclusion
And so we conclude our tutorial about Elastalert. With a simple usage, we can see that we can construct really powerful alerts for our Elasticsearch system, enforcing the rule of the search engine on a monitoring ecosystem. Thank you for following me on another post, until next time.
